How to use a section box in Revit to cut a 3D view
Choose a 3D cutaway, adjust its extents against the model, and control the box outline separately from the clipping setting.
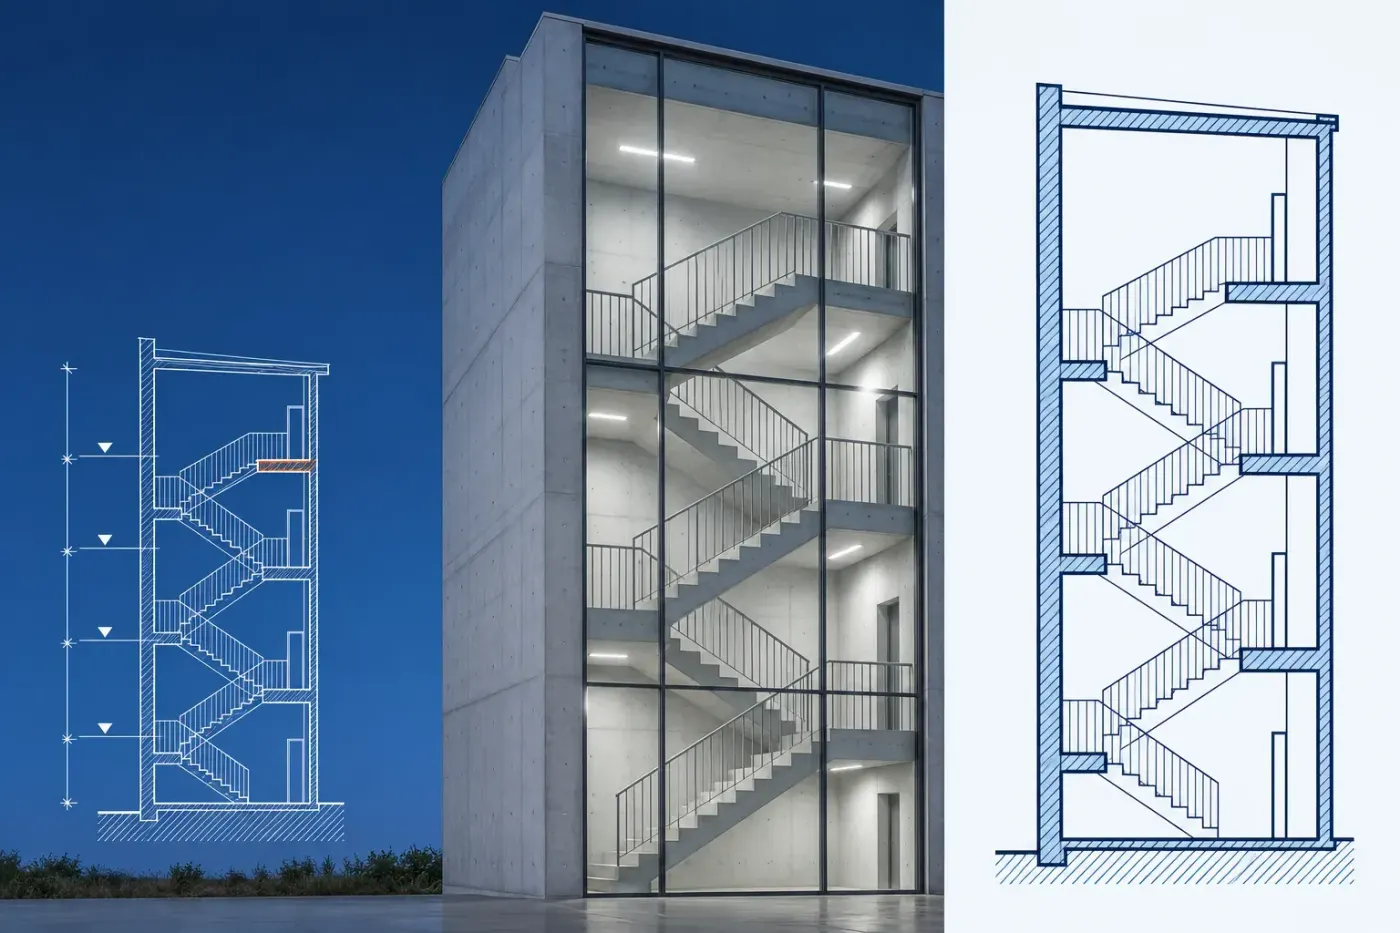
A Section Box clips the viewable model in one Revit 3D view and leaves every other view whole. In Revit 2027, and the same way in Revit LT 2027, open a copy of that 3D view, turn on Section Box under Extents in the Properties palette, click OK, then select the box and drag its controls around the part you need. For a room review, I'd start with Selection Box when the room's elements are easy to pick, because that selection gives the box a useful starting extent. The outline has a separate visibility control, so you can hide the frame while keeping the cut.
Choose the cutaway you need
| Set it here | It reaches | Choose it when |
|---|---|---|
| Section Box in the 3D view's Properties palette | The viewable portion of that one 3D view | You want to frame a room, floor or junction by adjusting the box. |
| Selection Box: Modify | <Element> tab > View panel | A box around selected model elements in the current isometric 3D view, or else the default 3D view | You already know which elements to inspect. |
| Section view | A separate view defined by a section line and crop region | You need a section drawing rather than a 3D cutaway. |
| Scope Box | Which views show the datums assigned to it (levels, grids, reference planes), plus the extents of views you apply it to | Several views need matching datum and view extents. It isn't a 3D cut: that still comes from Section Box. |
Use the view-property route when the region matters more than a particular set of elements; Selection Box wins when you can name the elements first.
Turn on Section Box and resize it
Start in the Project Browser, not in the 3D view itself. The box reaches only the view it's turned on in, so give it a view of its own: right-click the 3D view's name, choose Duplicate View > Duplicate, then right-click the copy, choose Rename and call it something like Stair review. A plain duplicate is independent, so the cut and any hidden outline stay in Stair review while the original keeps showing the whole model.
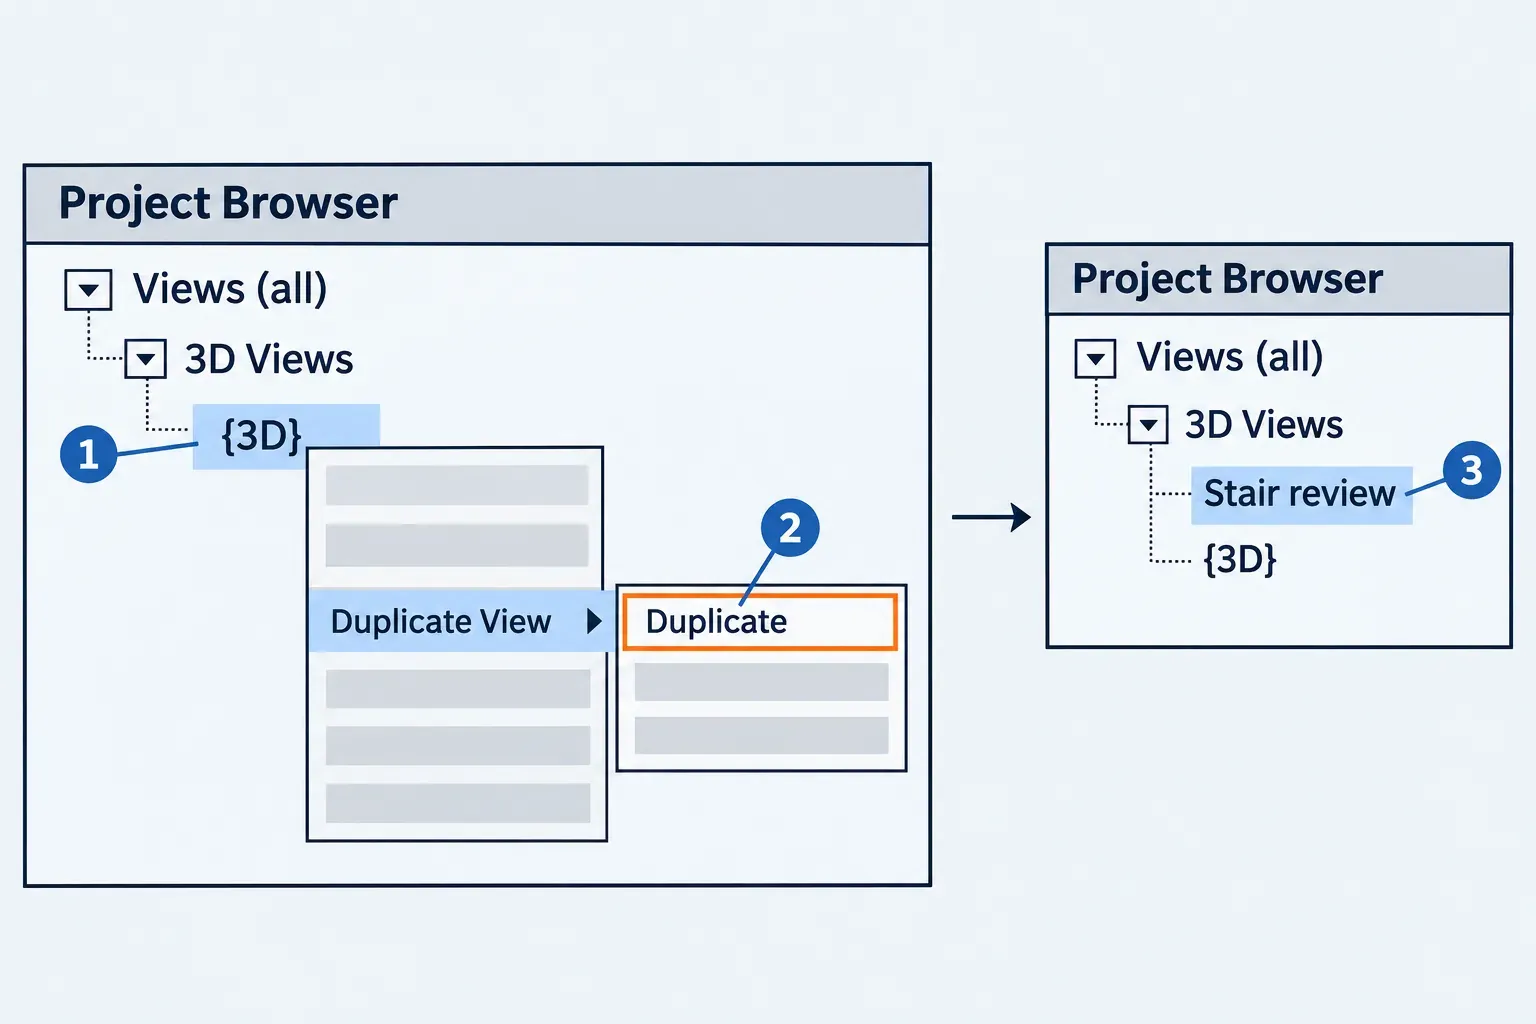
- Open Stair review.
- On the Properties palette, find Extents and select Section Box. Click OK.
- Select the section box. Use its drag controls to move the extents into the model until the part you need is exposed.
Enabling the box initially only adds the box to the view. The cutaway comes from adjusting its extents, as Autodesk shows in its 3D extents procedure. If the whole building still appears, first check where those extents sit in relation to the part you meant to expose.
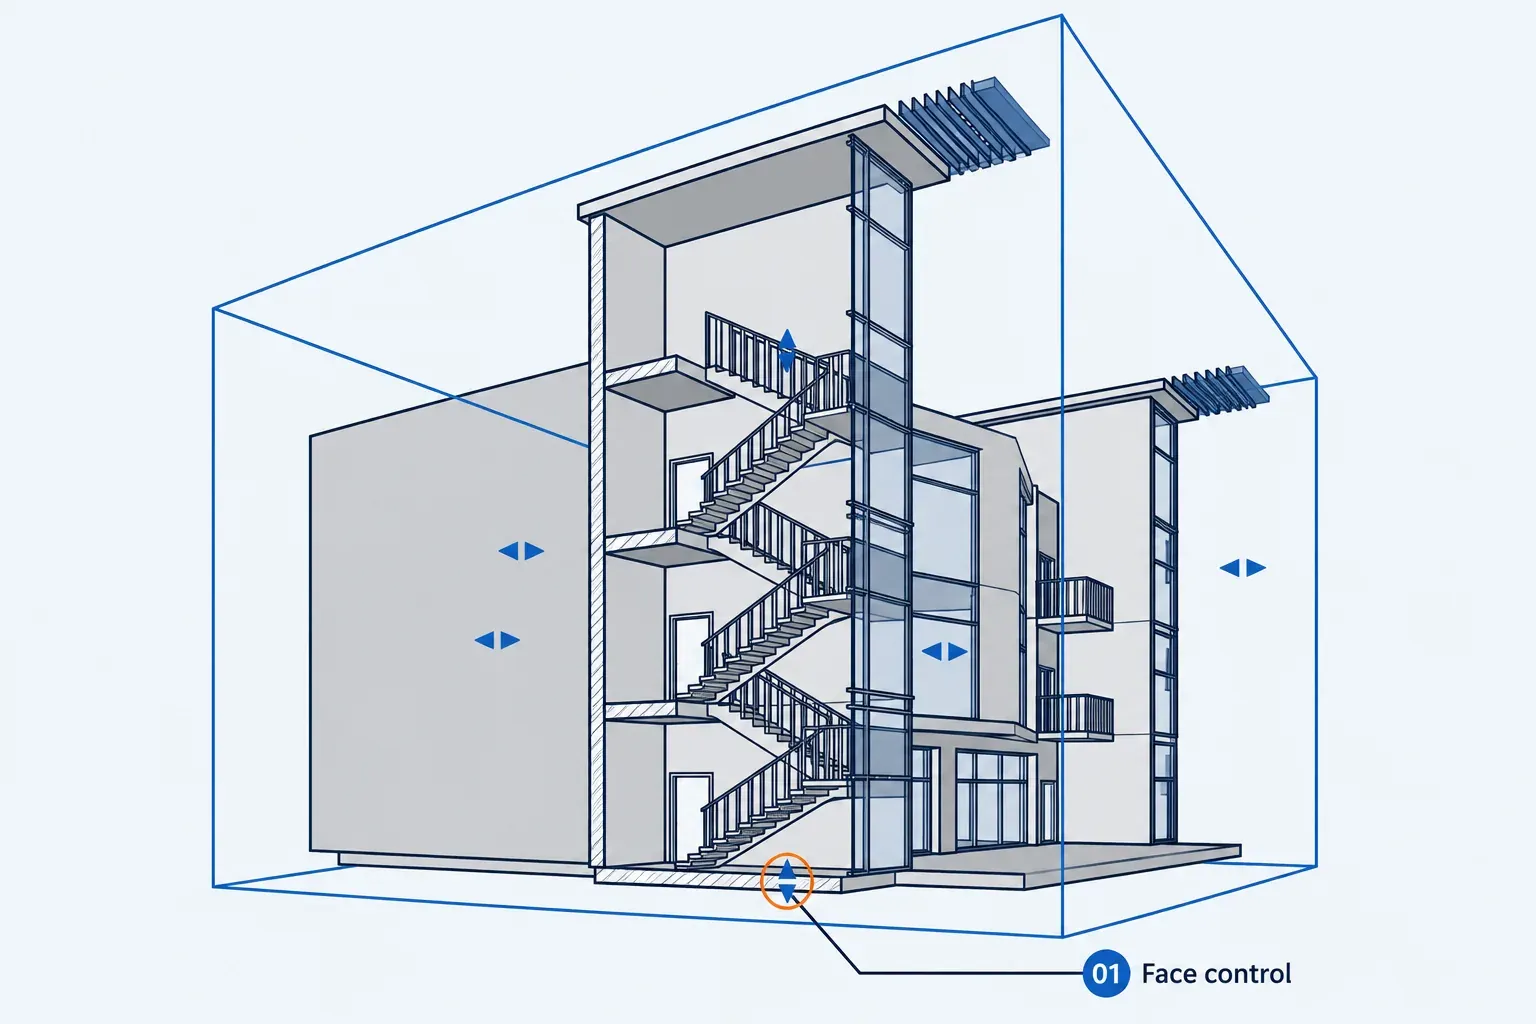
Check the result in the 3D view: keep the assembly you need inside the box, and inspect each cut face for context lost at the boundary. For example, a stair review may need the adjoining landing as well as the flight. That is a framing choice for this view, not a reason to change the stair.
Adjust the box from a plan or elevation
A second view can make the boundary easier to judge against the model. Keep the section box enabled in the 3D view before moving to an associated plan or elevation.
- Open the associated plan or elevation view.
- In the Project Browser, right-click Stair review and choose Show Section Box.
- In the associated view, drag the blue arrow controls to resize the box.
If the part you're framing runs at an angle, select the box in that plan and click Modify | <Element> tab > Modify panel > Rotate. In a plan view the Rotate tool turns a selection about an axis perpendicular to the view, so the box swings around its vertical axis.
Return to the 3D view to judge the cutaway after the adjustment. The associated-view method changes the section-box extents; the view's crop region does not crop those extents. Keep the crop boundary and the box boundary distinct when deciding which one to adjust.
Fit a Selection Box around picked elements
Choose the destination view before running Selection Box. Started from a plan or any other 2D view, Selection Box cuts the project's default 3D view and creates one if there isn't one; in a workshared model the 3D command keeps a default view per user, named {3D - username}. Rename that view in the Project Browser (right-click > Rename) before you present: a renamed 3D view is saved with the project, and the next click on the 3D tool opens a new unnamed view instead of your cutaway. To leave the default view alone from the start, pick the elements in your duplicated Stair review and run Selection Box there.
With the intended view open, select the elements you want to inspect. At least one selected element must have a 3D representation in the model.
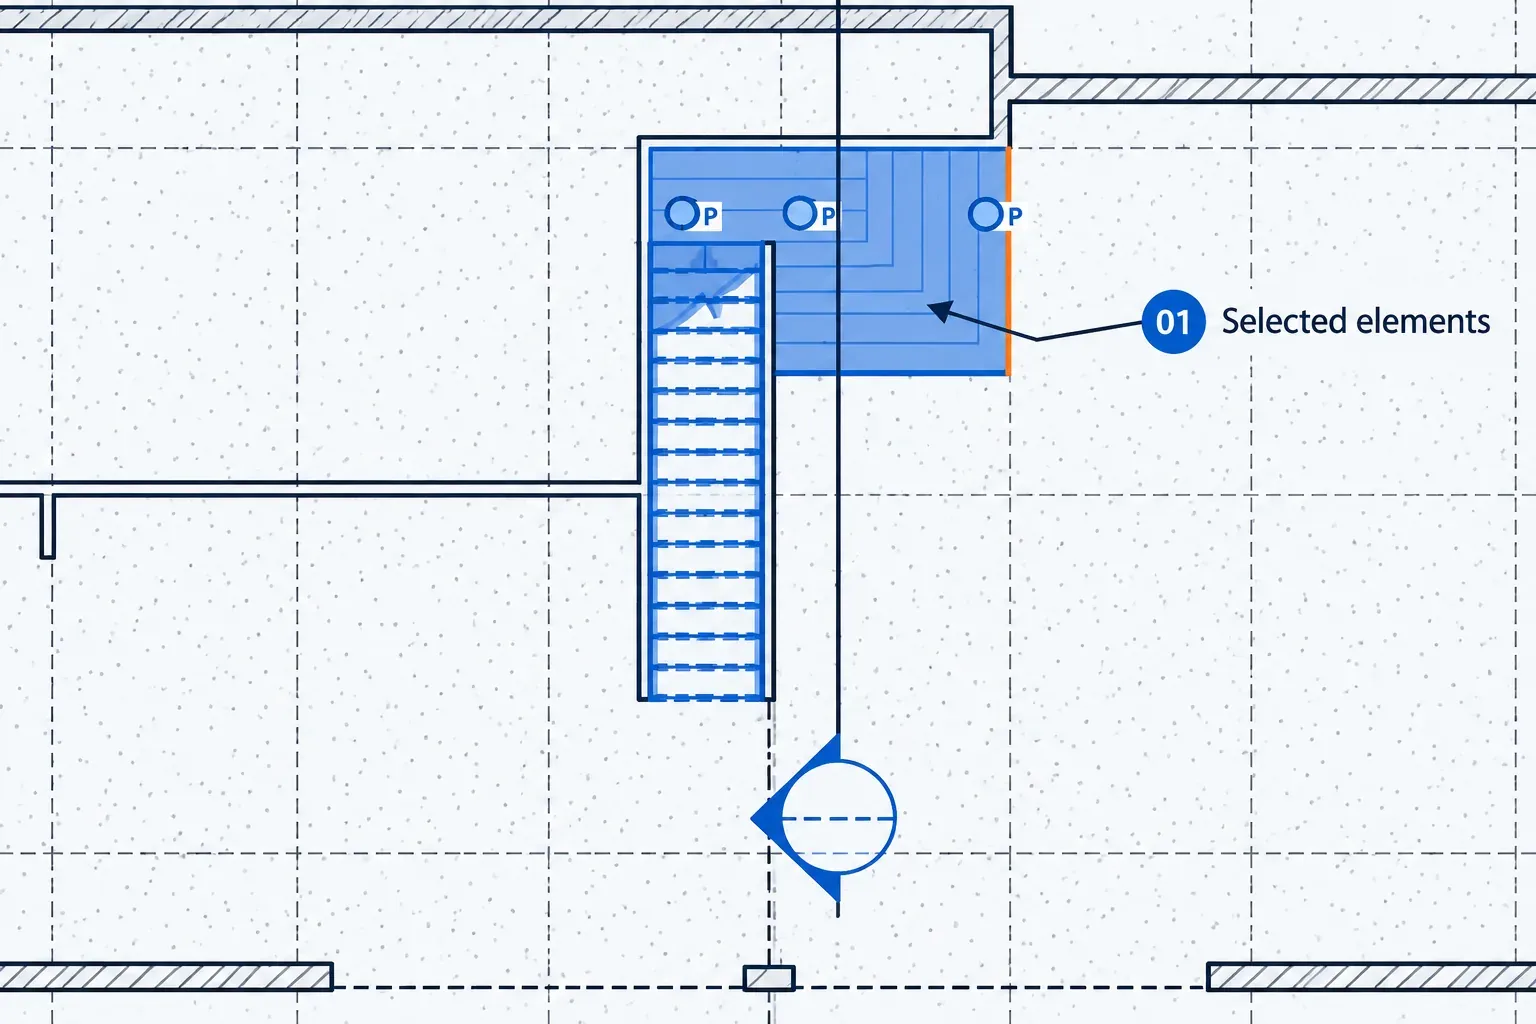
- With the elements selected, click Modify | <Element> tab > View panel > Selection Box.
- Revit opens the selection in the current view if that view is 3D isometric; otherwise, it uses the default 3D view.
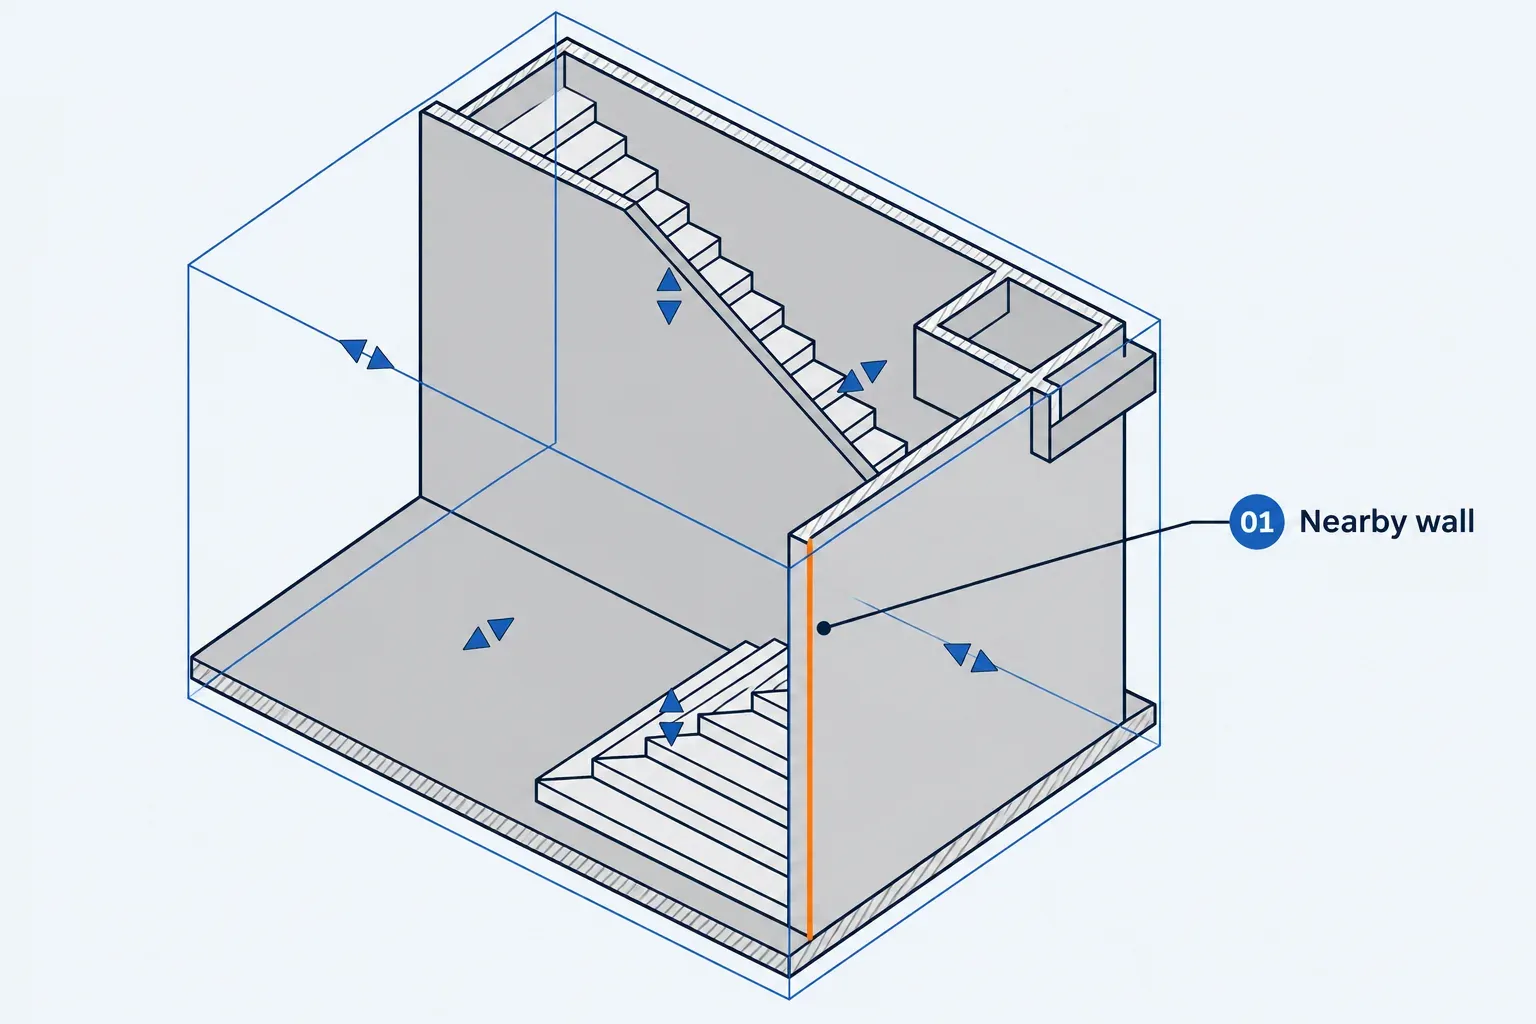
- Drag the box handles to refine the extents. Hide any remaining elements inside the box that obstruct the inspection.
Other elements inside the box can remain visible after Selection Box. Autodesk's Selection Box instructions include a separate step for hiding obstructing elements still inside the box. Check the surroundings before treating the cutaway as an isolated view of one component.
Hide the outline while keeping the cut
Before placing the cutaway on a sheet, hide the outline in Stair review once the framing is correct. Keep Section Box selected in Properties so the model stays clipped.
- In the 3D view, click View tab > Graphics panel > Visibility/Graphics.
- Open Annotation Categories, clear Section Boxes, then click OK. Select that check box again when you need the outline back.
To hide just this box instead of the category, right-click it and choose Hide in View > Elements. Bringing it back follows Autodesk's unhide procedure: click Reveal Hidden Elements on the View Control Bar, right-click the box, choose Unhide in View > Elements, then click Reveal Hidden Elements again to leave that mode.
Clearing Section Box in the view's Properties removes the box and its cut, including a box made with Selection Box, as the note in Autodesk's Selection Box topic confirms. Reach for it only when the cut itself should go.
Use a camera view or a separate section deliberately
Section boxes also work in perspective views: Autodesk's perspective-view Help describes using one to limit the viewable portion. Turn it on in the camera view's own Properties, as in the steps above. Selection Box won't cut a perspective view, because it uses the current view only when that view is 3D isometric and otherwise sends the box to the default 3D view. Camera placement and render settings belong with camera views and rendering.
The route stops where you need a drawing rather than a cutaway. A Section Box clips one 3D view; it doesn't produce a 2D section. For that, use a Section view from View tab > Create panel > Section, defined by a section line and crop region. Once Stair review is framed and its outline hidden, the next step is placing views on sheets.