How to halftone a family or element in a Revit view
Override Graphics in View grays one instance in one view only. For a family that should sit pale on every plan, a rule-based filter carried by a view template reaches further. Category, linked model, Brightness and print settings follow, with the Revit LT limits at each step.
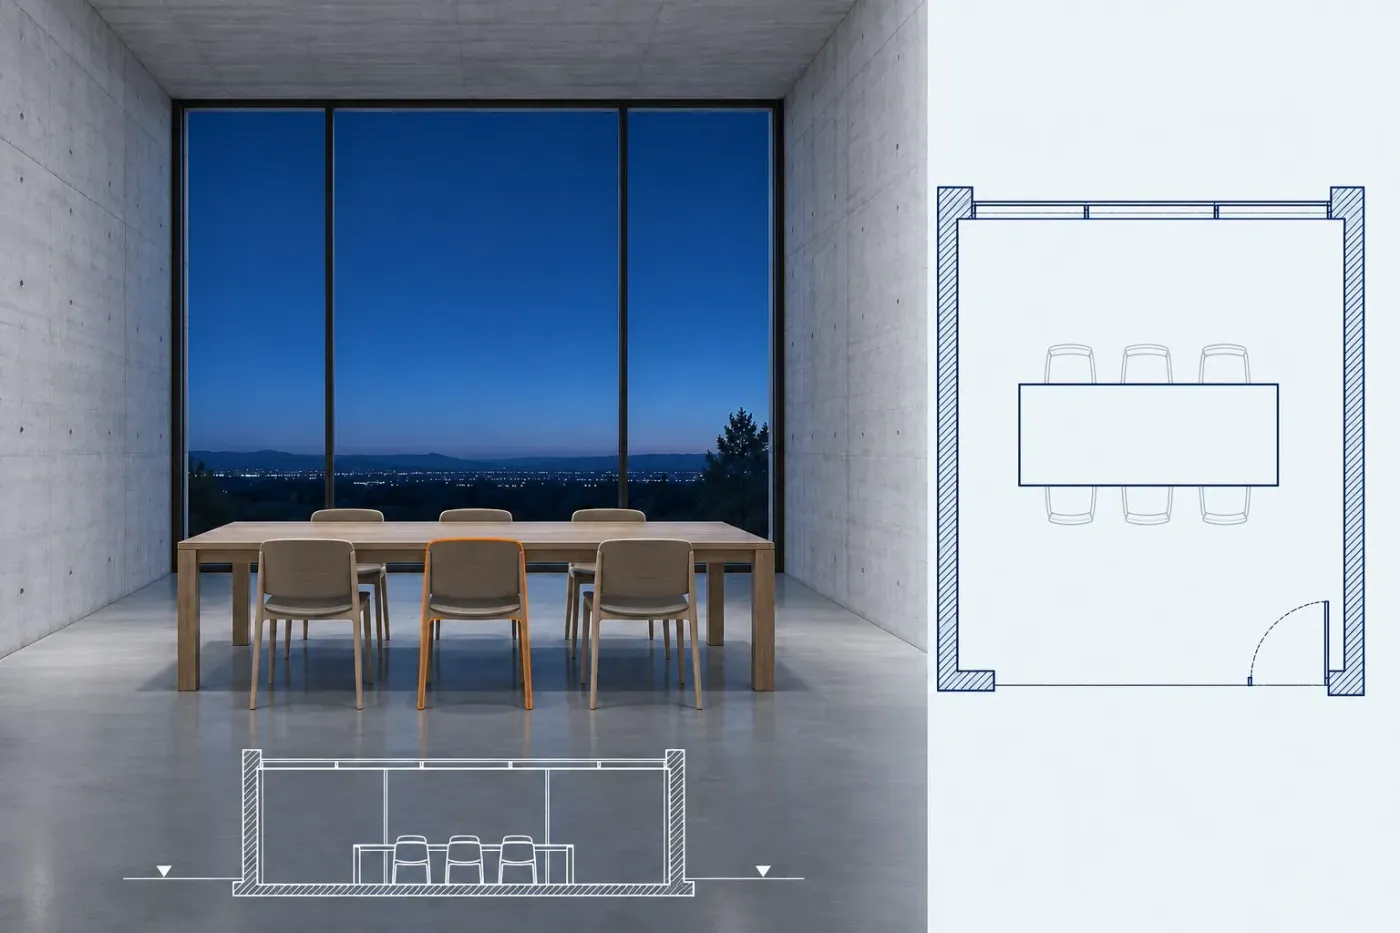
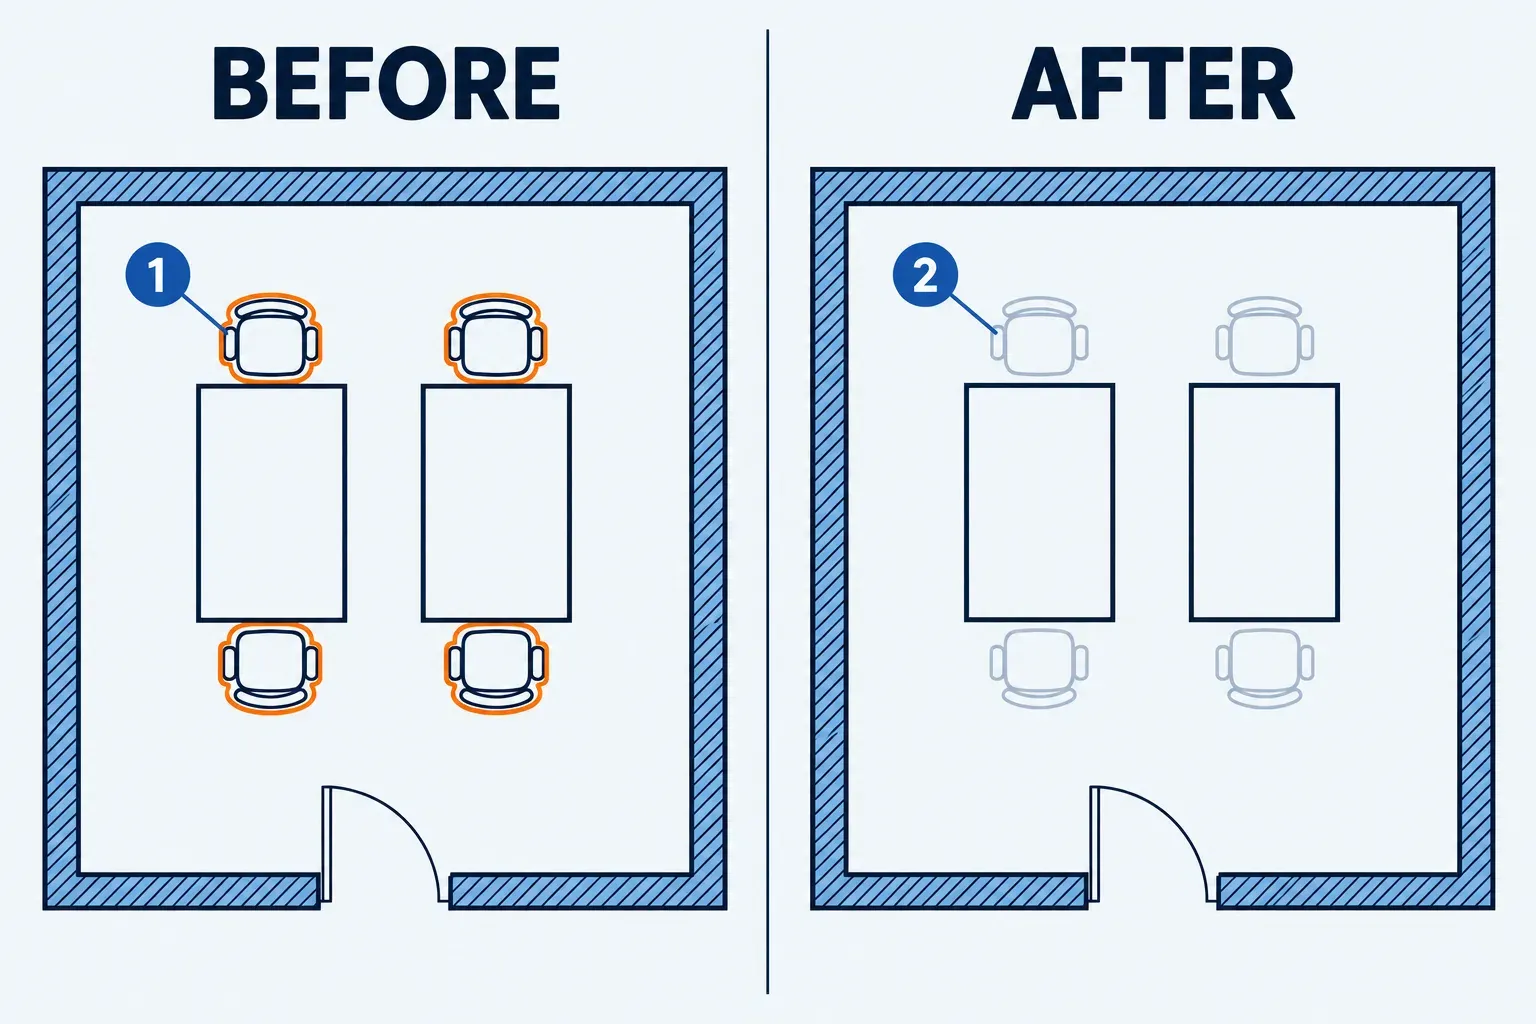
To halftone a family instance, open the view, right-click the instance and choose Override Graphics in View, then By Element. In the View-Specific Element Graphics dialog, select Halftone and click OK. This element override reaches only the selected elements in that view and isn't stored in a view template. For the same family on every plan, use a rule-based filter in an assigned view template.
Halftone blends line color with the background: lines, fill patterns and solid fills become pale, while material color in shaded views stays the same. The routes below follow Revit 2027 on Windows in English. Revit LT has the element override too, along with category and linked-model halftone, but LT has no view-filter editing tools or saved selection sets. These controls apply to your Revit families; other view graphics tasks sit under views and sheets.
Which halftone setting reaches which views
These are the settings that make something pale on purpose, or carry that choice to other views. They differ in how far the gray travels: one element in one view, every element of a category, every matching element in every view under a template, or the whole project. Read the middle column before you pick one.
| Set it here | It reaches | Choose it when |
|---|---|---|
| Override Graphics in View, By Element, Halftone | The selected elements, in the current view only. Never saved in a view template. | One view needs a few pieces pale for one review or one sheet. |
| Halftone box on a category row in Visibility/Graphics | Every element of that category in the current view, whatever its family. | The whole category should recede, such as all furniture on a lighting ceiling plan. |
| Saved selection added on the Filters tab | Only the elements saved in the selection, in each view where you add it. | The pieces share no parameter value you could write a rule for. Requires full Revit to create or edit. |
| Rule-based filter added on the Filters tab | Every element of the chosen categories that meets the rules, in each view where you add it. | One family or type should be pale wherever it appears. Requires full Revit to create or edit. |
| View template that includes V/G Overrides Filters | Every view the template is assigned to, including after later template edits. Applying it copies the settings once. | A set of plans should share the same gray; assign the template to new plans that need it. |
| Halftone column on the Revit Links tab | All instances of a linked model, or one instance, in the current view. | A consultant's model should sit behind your own work. |
| Brightness in Halftone/Underlay | The project, not one view. | Halftone reads too faint or too heavy everywhere. |
For furniture that should fade on every plan, I'd use a rule-based filter in an assigned view template because it also catches matching chairs placed later. A rule-based filter matches category and parameter values; a saved selection keeps the elements you picked until you edit the set. Use By Element for a few pieces in one view, or the category box when every family in that category should fade. In LT, Select All Instances plus By Element handles one family type in one view, while a category override can travel through a template. Filters already carried in a full-Revit view template still apply in LT, but LT cannot edit those filter settings.
Gray one family on every plan with a filter and a template
Before step 1, open a floor plan where the family is visible, in full Revit. Note its category (Furniture for a chair) and one value that marks this family and nothing else. That can be a word every one of its type names contains, or a type or shared parameter you control. Then look at the View Template row on the Properties palette. If a template is assigned, the properties it controls display in gray, and those changes belong in the template, not in the view.
Build the rule-based filter
Autodesk's steps to create a rule-based filter run in this order:
- Click View tab, Graphics panel, Filters. In the Filters dialog, click New.
- In the Filter Name dialog, type a name you will recognize later on the Filters tab, such as Chairs halftone. Select Define rules and click OK.
- Under Categories, select Furniture, or the category your family belongs to. The parameters a rule can use depend on the categories you select here.
- Under Filter Rules, click Add Rule. Pick Type Name, the contains operator and the word your chair types share. Autodesk's own rule examples use Type Name with contains.
- Click Apply or OK to save the filter.
Expected result: the filter is listed in the Filters dialog, and the plan looks unchanged because the filter is not yet added to any view. Text values in filter rules are case-insensitive, and the value drop-down lists values from elements in the current model. Opening that drop-down is a quick way to see whether your word appears in the type names. The contains operator checks type names across the selected category: Armchair also matches chair, even in another family. Use a narrower value or a dedicated parameter when the word would catch the wrong pieces.

Add the filter to the view and switch on Halftone
The help on applying a filter to a view says the filter applies to the current view only. Every other plan gets it from the template in the next section.
- Click View tab, Graphics panel, Visibility/Graphics, or type VG. Open the Filters tab and click Add.
- In the Add Filters dialog, pick Chairs halftone and click OK.
- On the filter's row, leave Visibility selected and select Halftone. The Halftone box only acts when Visibility is selected. Keep Enable in View selected, because clearing it switches the filter's effect off in this view.
- If another filter on the list also catches these chairs, move the one you want higher. The filter at the top of the list takes precedence.
- Click OK.
Expected result: the matching chairs draw pale, and desks, tables and any chair types the rule misses keep their full line color. If every piece of furniture turns pale, look at the Furniture row on the Model Categories tab. A category Halftone box there is a separate setting from the filter.
Carry the filter to other plans with a view template
Before you assign anything, check what the template will carry besides the filter. A template controls every property selected in its Include column. The view template properties include V/G Overrides Model and Annotation, Phase Filter and Discipline as well as V/G Overrides Filters. Any of them left in the Include column is pushed onto every plan the template is assigned to.
- With the plan active, click View tab, Graphics panel, View Templates drop-down, Create Template from Current View. You can also right-click the view in the Project Browser and choose Create View Template From View. Name the template.
- In the template's properties, keep Include selected for V/G Overrides Filters. Clear Include for any row the other plans should keep for themselves. The help on creating a view template explains how the Include column works.
- Assign it to keep the plans linked. Select a plan, then on the Properties palette click the button in the Value column of View Template and choose the template in the Assign View Template dialog. Assigning a view template creates a link, so later edits to the template reach every assigned view. Properties the template controls show in gray in those views.
- Or apply it for a one-time copy. Select the plans in the Project Browser (Ctrl for several). Click View tab, Graphics panel, View Templates drop-down, Apply Template Properties to Current View, or right-click and choose Apply Template Properties. Then pick the template in the Apply View Template dialog. When you apply a view template, later changes to the template do not reach those views, and their View Template property stays as it was.
Assign when the plans should keep matching. Apply when you want a starting point and expect the plans to diverge. Expected result: each target plan shows the chairs pale, and with Assign, its View Template row names the template. If another project needs the same filter and template, Transfer Project Standards can copy filters and view templates between projects.
Check it away from the plan you edited
- Open a different plan that has the template assigned. The chairs should already be pale there without any change to that view.
- Place a new chair of a matching type. It meets the rule as soon as it exists, so it should draw pale like the others.
- Place the plan on one of your sheets and look at the viewport. The gray belongs to the view, so the sheet should show it too. Then print or export one test sheet, as described further down.
One element in one view with Override Graphics
This route has the shortest reach, so decide first whether that is what you want. The gray stays in the open view, and no template will carry it anywhere else. Open the view where the element should be pale and make sure the element is visible there.
- Select what should go pale. For every instance of one family type in this view, right-click one instance in the drawing area, or that type under Families in the Project Browser, and click Select All Instances, then Visible in View, as the help on selecting all instances describes. For a family with several types, Ctrl-click one instance of each type in the drawing area before you right-click. Select All Instances also supports several selected types, subject to the element categories involved. For a few hand-picked pieces, click them in the drawing area instead and hold Ctrl to add more.
- Right-click one of the selected elements and click Override Graphics in View, By Element. Keep the selection active while opening the dialog.
- In the View-Specific Element Graphics dialog, select Halftone and click OK.
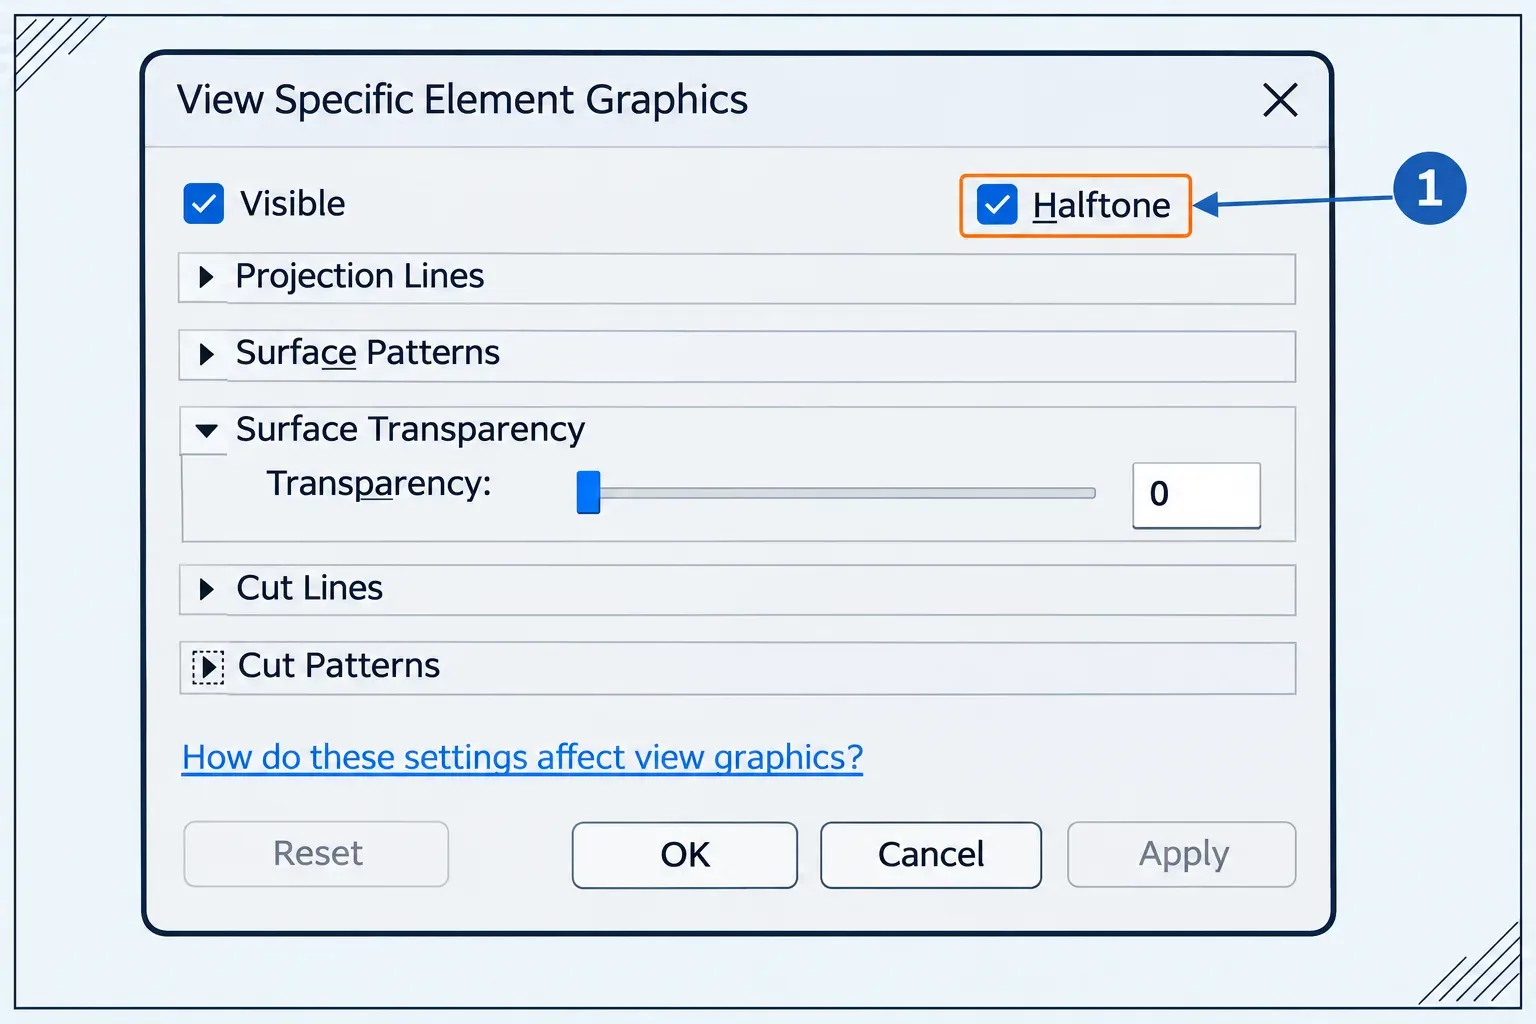
Expected result: the selected instances draw pale, and everything you left unselected keeps its full line color, including other types of the same family. A chair placed later does not inherit this By Element override; select the new instance if it needs the same treatment. Then open a section or another plan that shows the same element. It should look normal there, which confirms the change stayed in one view. To undo it, open the same dialog on the element and clear Halftone. For annotation, import and detail elements, the dialog shows only the options that apply to them.
Several hand-picked elements in more than one view
When the pieces have nothing in common that a rule could match, save them as a selection-based filter. This needs full Revit. Select the elements, click Manage tab, Selection panel, Save, and name the selection in the Save Selection dialog. Then add it on the Filters tab of each view that needs it, with Halftone selected, exactly as with the rule-based filter. A chair you place later stays dark until you add it: click Manage tab, Selection panel, Edit. In the Edit Filters dialog, under Selection Filters, select the filter and click Edit, then use Add To Selection and Finish Selection on the Edit Selection Set tab. You cannot add categories to this kind of filter.
A whole category with the Visibility/Graphics Halftone box
Visibility/Graphics sets halftone per category. There is no row for an individual family or type, so the box fades every family in the category. Autodesk's overview of visibility and graphic display gives furniture half-toned on a lighting ceiling plan as an example use.
- Open the view. Click View tab, Graphics panel, Visibility/Graphics, or type VG.
- On the Model Categories tab, or on Annotation Categories or Imported Categories, select the Halftone check box next to the category.
- Click OK.
Expected result: every element of that category in this view takes a lighter line color. You can do the same from the canvas: right-click an element, choose Override Graphics in View, By Category, and use Halftone in the View-Specific Category Graphics dialog. Autodesk's page on category overrides in a view describes both routes. To undo only the halftone, clear the category's Halftone box. Use Reset in the category dialog, or Clear Overrides in Visibility/Graphics, when you intend to remove the other graphic overrides too. As the help on removing overrides puts it, the display then follows Object Styles or the override hierarchy. If the category row is grayed out, check the assigned view template first. Edit the controlled row in that template, clear its Include, set View Template to None or assign another template, as the troubleshooting note on grayed categories lists. LT's category override has the same Halftone check box.
Linked models: Halftone, Underlay and the categories inside a link
A linked model is handled on its own tab. To display a linked model in halftone, open the view and click View tab, Graphics panel, Visibility/Graphics. On the Revit Links tab, select the box in the Halftone column for the link and click OK. The reach is the current view.
The Revit Links tab is a tree. The parent row is the linked file, and a change there affects every instance of it. A child row is one placed copy, and a change there affects only that copy. The Underlay column also draws the link in halftone, and an underlay will not obscure new lines and edges. The catch is that elements in a link set as an underlay are not eligible for tagging. If you need to tag the consultant's elements, use Halftone instead. The same page says visibility for linked models is controlled by view, and that a view template can save one view's link settings for the other views.
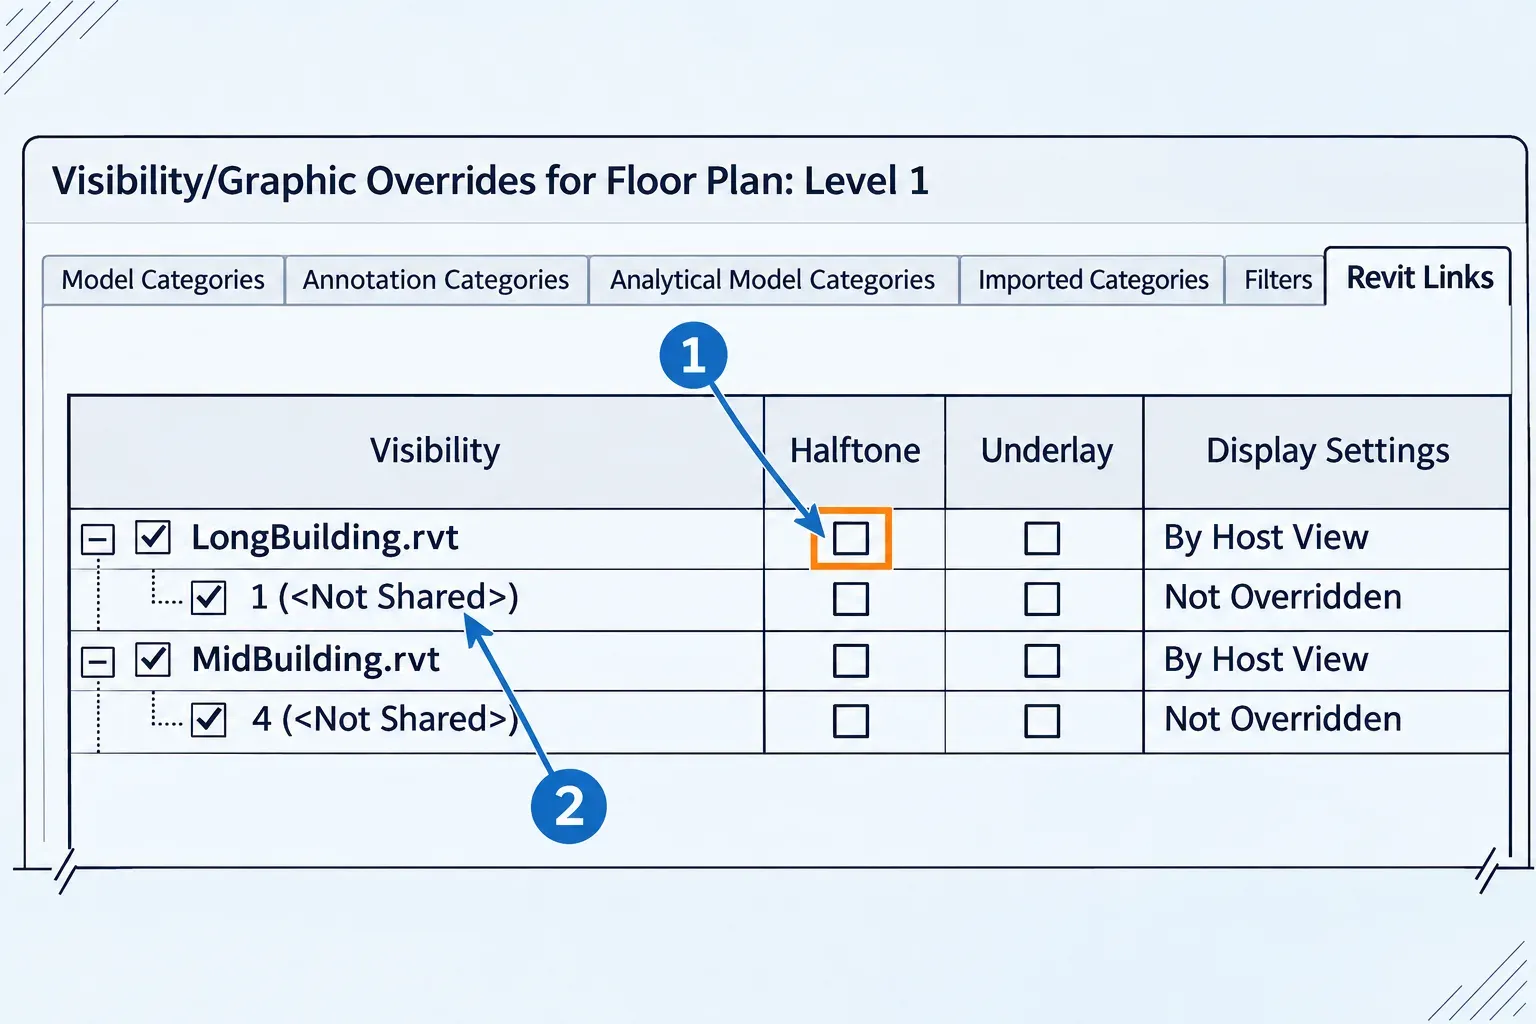
To halftone a category inside a link differently from the same category in your own model, click the button in the Display Settings column. In the RVT Link Display Settings dialog, choose Custom on the Basics tab. Then, on a category tab, choose Custom from the drop-down and set the overrides there. The three display settings for linked models behave differently:
- By host view, which the help on displaying a link by host view calls the default: the host view's filters and Visibility/Graphics settings apply to the link, so a host filter such as Chairs halftone, or the Halftone box on the host's Furniture row, acts on the link as well.
- By linked view: the link uses the settings of a view inside the linked model.
- Custom: you control the link separately, including whether host or linked view filters apply.
Use the Worksets tab in that dialog to control whether linked worksets are visible; use a category or filter for their halftone treatment. The Revit LT feature list keeps Visibility, Halftone and Underlay for links in LT, but drops the Display Settings column. A link at By host view already follows the host's category Halftone boxes and filters; halftoning a category inside the link differently from the host needs By linked view or Custom in that column, which Revit LT does not have.
When the gray will not show, or will not go away
Most of these cases come down to Revit's override priority list. An element's By Element Halftone outranks view filters, filters outrank phase graphic overrides, and those outrank category settings in Visibility/Graphics. The list gives only this order. It does not say how a filter's Halftone combines with a category's Halftone, so set the gray in one place rather than both.
If the chairs should be pale but are not:
- On the filter's row, Enable in View or Visibility is cleared. Halftone needs both.
- A filter higher on the list catches the same chairs with other settings. Move yours up.
- The rule misses them. Check that the right category is selected in the filter and that the word really appears in each type name.
- The view's template controls V/G Overrides Filters but does not include your filter. Add the filter to the template instead of the view.
- The chairs are in a link whose Display Settings are By linked view or Custom, so host filters may not apply.
If elements are pale and you never set halftone:
- The view's Discipline is Mechanical, Electrical or Plumbing. Ceilings do not display in MEP plan views; the other non-MEP categories that remain visible draw in halftone and cannot be picked with a selection box. For a coordination view, Coordination removes that automatic discipline fade. Changing Discipline also changes view graphics and tags, so keep the intended discipline on a dedicated MEP plan and check its halftone settings instead; an explicit element or filter override still needs its own fix.
- The plan has an underlay. Range: Base Level on the Properties palette shows another level, in halftone, under this one. A new plan starts at None.
- Depending on the view's phase filter, existing or demolished elements follow the phase status settings on the Graphic Overrides tab of the phase graphics dialog (Manage tab, Phasing panel, Phases), where a status can be set to Halftone. Those settings describe phase status, so moving furniture into another phase to borrow its gray puts a drawing choice into the phasing data.
- The view's Display Model property is Halftone. All model elements then draw pale while detail elements stay normal, a setting meant for tracing, dimensioning and aligning over the model.
- An old By Element Halftone sits on the element and outranks any filter. Open View-Specific Element Graphics on it and clear the box.
- A sketch or edit mode is open. Revit 2027's What's New note on halftone in Accelerated Views says halftone dimming is enabled for non-editable elements in Sketch and Edit modes, so what you cannot edit in that mode draws pale while it is open.
Lighter or darker halftone for the whole project
How pale halftone looks is set once for the project rather than per view. Click Manage tab, Settings panel, Additional Settings drop-down, Halftone/Underlay. Under Halftone, Brightness takes a value, or a slider position between Light and Dark. The Underlay group holds Weight, Pattern and Apply halftone, which apply to underlay graphics. Write down the current Brightness value before you change it so you can restore the same project setting. Because the setting belongs to the project, the change shows in every view that uses halftone.
Halftone on printed sheets and in PDFs
Printing has its own halftone choice. Open File tab, Print, Print Setup, or click Setup in the Print dialog. The Print Setup options include Replace halftone with thin lines, which draws halftone elements as thin lines instead of pale ones. Revit uses these settings when it prints views and sheets and when it creates PDF, PLT or PRN files. The Colors setting offers Black Lines, Grayscale and Color. For Black Lines, the help says all text, non-white lines, pattern lines and edges print in black. The same page does not say what happens to halftone lines under Black Lines, so check one sheet before you print the whole set.
PDF Export (File tab, Export, PDF Export) has an export setup for size, orientation, appearance, output processing, naming rules and options. The help refers to the Print Setup dialog for those settings, and the export setup carries the same replace-halftone-with-thin-lines choice. To check the result, export only the sheet with the chairs plan and zoom in on a chair in the PDF. It should be pale, or a thin line if you chose to replace halftone.
Where each route stops
If a category inside a link needs different graphics from the host, use By linked view or Custom in Display Settings; that separate control needs full Revit. For the opposite drawing task, make cut walls read darker with poche walls.