Revit families explained: system, loadable and in-place
System families define built-in elements, loadable families travel as RFA files, and in-place families stay tied to a project. Follow one door to see how far each edit reaches.
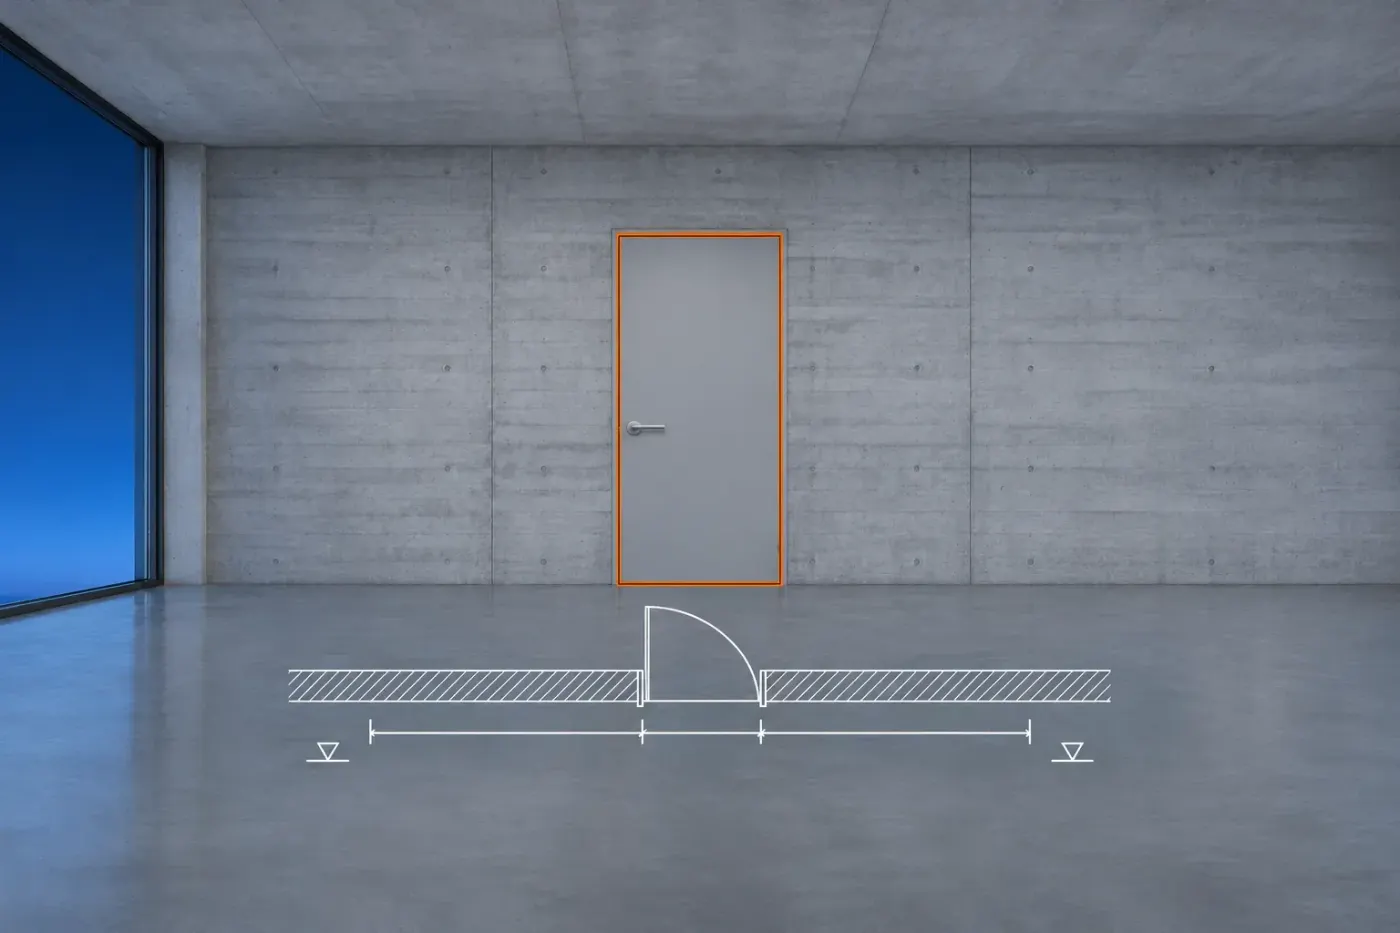
A Revit family groups elements that share parameters and a related graphical representation. Full Revit has three kinds of families: system, loadable and in-place. For an ordinary door, choose a loadable family so one design can have several sizes and be used in other projects.
The examples and control names here follow English Revit 2027 Help. Revit LT uses system and loadable families; its exception for in-place walls is covered below.
Choose the kind by how the element will be reused
The family kind tells you where the element is defined and how you can reuse it. A family type is a different distinction: it holds a particular set of values within a family.
| Kind | Examples | Where it is defined | Choose it when |
|---|---|---|---|
| System | Walls, floors and roofs; also project settings such as levels and grids | Built into projects and templates; customize its types | Revit already provides the element as a system family |
| Loadable | Doors, windows, furniture and title blocks | A separate RFA file loaded into a project | The component needs reusable geometry or multiple types |
| In-place | Unique geometry fitted to this project | Inside the current project, with one family type | The shape depends on this building and is not intended for repeated reuse |
Hosted, nested and shared describe other aspects of a family. A wall-hosted door is still a loadable family. Those labels don't add more kinds to Autodesk's three-kind classification.
Follow one door from category to instance
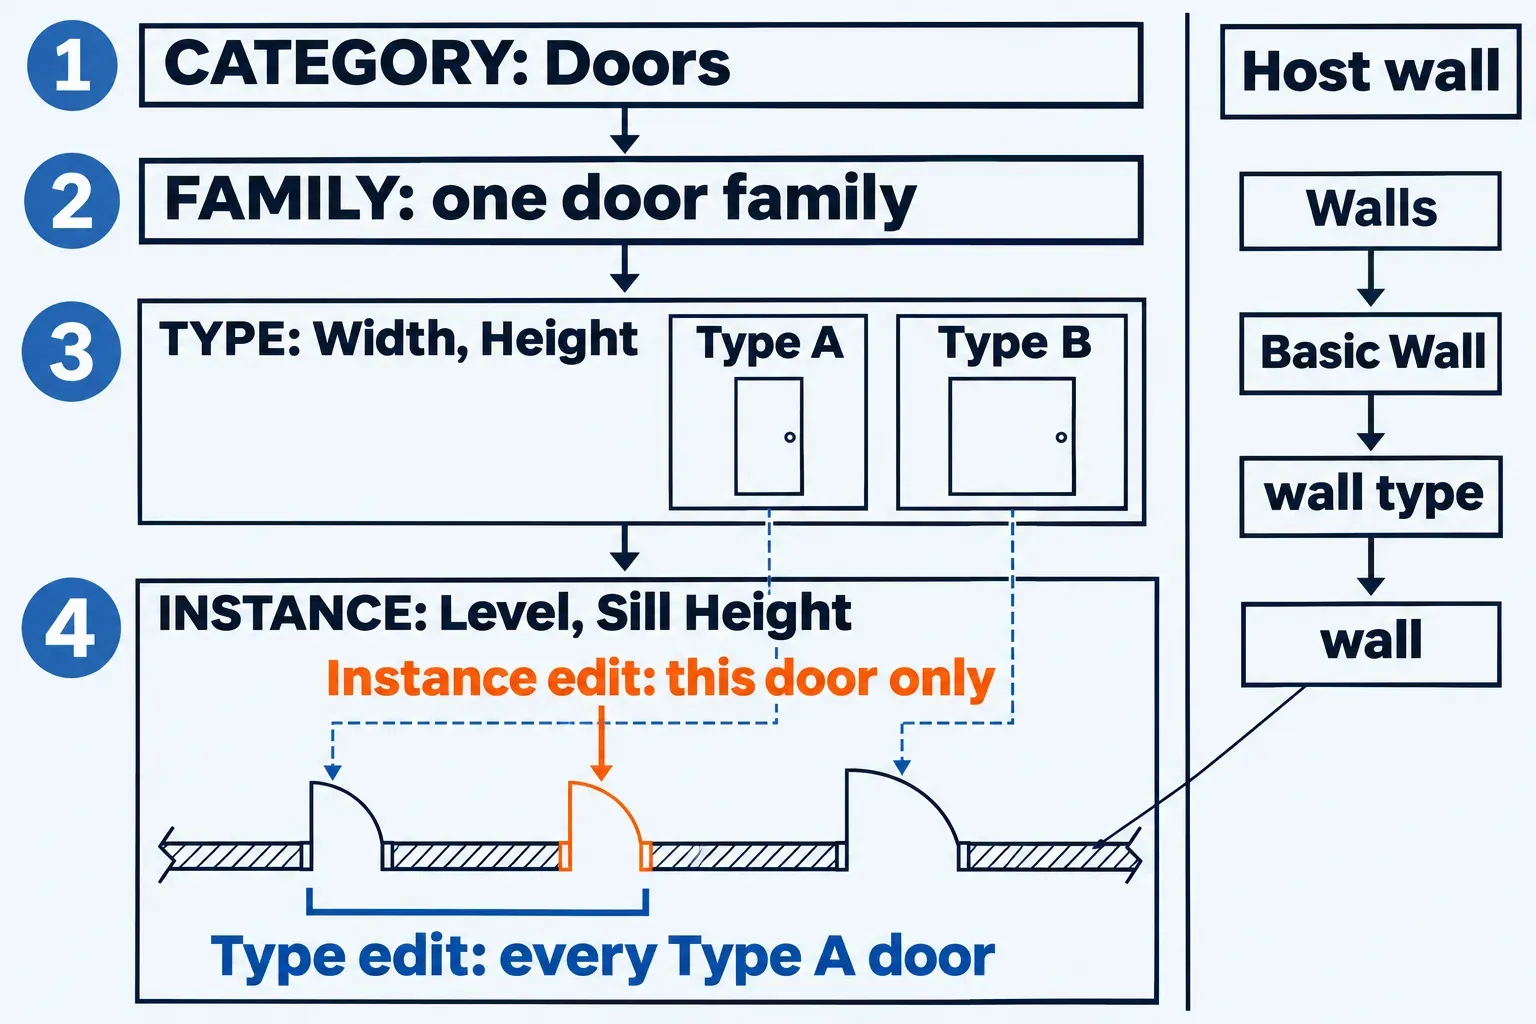
Revit organizes families by category, then by family and type. Placing a type in a project creates an instance. Use a wall-hosted door in a Basic Wall for this example. Its four levels look like this:
- Category: Doors. This classifies the element. The Project Browser groups loaded door families under Families, then Doors.
- Family: a particular door design. Its geometry and parameter definitions belong together. The family may have arrived in the project template or been loaded later from an RFA file.
- Type: one configuration of that design. For example, one size. The available properties depend on how the family was made; Autodesk lists Width and Height among door type properties.
- Instance: the door placed in this wall. It has its own properties. For example, Sill Height positions that door relative to its level without resizing it.
Change one door without changing all matching doors
Select one existing door before editing. The Properties palette displays its instance properties, while Edit Type opens its type properties. With no element selected and no placement tool active, the palette displays the active view's properties instead.
A type change reaches all current and future instances of that type. An instance change reaches the selected elements. If several doors are selected, an instance edit can change all of them, so check the selection before assuming the change is local.
I'd duplicate the type for one wider door because editing the shared type would also widen its other instances. If the loaded family exposes an editable Width type parameter, create the new type in the project:
- Select the one door that needs the new size and click Edit Type on the Properties palette.
- In Type Properties, click Duplicate. Enter a distinct name and click OK.
- Set the new type's Width, then click OK in Type Properties.
- Check the Type Selector: the selected door should use the new type. Other doors that used the original type should remain on it.

This new type exists in the current project. Creating it here doesn't save an updated RFA into your external library.
Check the result in a schedule
A second view makes the edit's reach easier to verify. Open an existing door schedule that displays the relevant properties and compare another door of the original type. A type property such as Manufacturer changes for all instances of that type; an instance property applies to the selected door or doors.
Schedules update from model properties, and a schedule placed on a sheet carries those updates too. Check its grouping: several instances can be collapsed into one row, so one visible row doesn't necessarily mean one door.
The host wall has its own system-family hierarchy
The door and its wall remain separate elements. In the wall's hierarchy, Walls is the category, Basic Wall is a family, a particular wall assembly is a type, and the wall drawn in the project is an instance. Wall type properties control its layers and thickness; Location Line is an instance property.

System families are predefined. You can duplicate and modify their types, but you can't create another system family or save one as an RFA. A thicker wall starts with a duplicated wall type, using Edit Type and Duplicate, rather than a new family file.
To move system family types between projects, use copy and paste for a few types, or transfer the selected system families' types when you need the full set. Transfer Project Standards is on Manage tab, Settings panel. Its New Only option preserves duplicate types already in the receiving project; Overwrite replaces those duplicates. Loadable door families don't come across through this standards transfer.
Be careful when cleaning up types. Delete from Project also deletes matching instances. Reassign walls before deleting a type they still use. Revit won't let you delete the last type of a system family.
Loadable families travel as RFA files
A loadable family is the reusable file behind the door design. Once loaded, it is saved with the project. Some project templates already contain loaded families, so the absence of a separate RFA beside the project doesn't mean the family is missing. The distinction between RFA and the project file belongs to the Revit file types guide.
To load a local RFA, use Insert tab, Load from Library panel, Load Family. Select the file and click Open. Check Families in the Project Browser for the family and its types; loading makes the type available, but doesn't place an instance. The full family-loading steps cover that next stage.
To edit the family definition, select a loaded instance and use Edit Family to open the Family Editor, then Load into Project to return the edited family. When reloading, overwriting the existing version and its parameter values also replaces the project's existing type values. Check that choice before applying it to a family already used throughout the model.
An empty library folder is a content issue
Revit's core content includes project templates and generic family templates, but family library packs are optional downloads. Their contents depend on language, region and discipline. An empty Load Family folder can mean the pack hasn't been installed; it doesn't establish that the application needs reinstalling.
For Autodesk's online content, use Insert tab, Load from Library panel, Load Autodesk Family. It requires an Autodesk subscription and internet access. End an active placement command first: this cloud button is disabled while another command is running. Local files still use Load Family. For external libraries, the family-source guide separates Autodesk content, manufacturers and other suppliers.
A type catalog limits which sizes enter the project
A family with many sizes can have a separate TXT type catalog beside its RFA. The catalog uses the same file name and directory as the family and stores the values that define its types. It is a companion to the RFA, not another family kind.
When loading that RFA, select the required types in the Type Catalog, using Ctrl for multiple selections, then click Open. Autodesk's example is a structural column family with many section sizes. Loading only the needed sizes keeps the project and Type Selector from filling with unused types.
Keep in-place geometry for a shape tied to this project
In-place elements suit unique geometry or geometry tied to other project elements. A counter fitted to a curved lobby wall is one example. You can place copies of an in-place element, but you can't duplicate its family type to create a set of different types. A loadable family is the better choice for a desk that needs several configurations or reuse in other projects.
In full Revit, open the project and choose Architecture tab, Build panel, Component drop-down, Model In-Place. Choose the appropriate category in Family Category and Parameters, name the family, model it and click Finish Model. The category affects its Project Browser grouping, scheduling and visibility, so choose the category that describes the element.
Revit LT can move and modify existing in-place elements, but it can't create them except for in-place walls. LT's wall route is Architecture tab, Build panel, Wall drop-down, In-Place Wall. That exception doesn't provide a general Model In-Place tool for furniture or other components.
Start from a suitable existing family when its geometry and hosting fit the job; Autodesk's loadable-family guidance recommends adapting similar content to save work. When the design needs new geometry or a different host, continue with creating a family in the families section.