How to create sheets in Revit and place views on them
Create a sheet with a title block, place prepared views and pin the layout. Check numbering scope, separate project and sheet fields, then review the PDF set.

In an open Revit project, choose View tab, Sheet Composition panel, Sheet, select a title block in New Sheet and click OK. Then drag prepared views from the Project Browser onto the sheet, or use Place View. Align the viewports, fill the title block and check the exported PDF before issuing the page.
The menu names here follow the English Revit 2027 Help, and Revit LT 2027 takes the same route: sheets, title blocks, Place View, guide grids and PDF export aren't among the tools the Revit LT feature comparison lists as missing. Title-block fields depend on the family and project template you have loaded.
A sheet view is one page in a drawing set. It can hold several drawings and schedules, which Autodesk describes as viewports when they are placed on a sheet. The sheet gathers those views into a page layout. The views and sheets section covers the related tasks that happen before and after this one.
Start with a view set that can be placed
Open the project that contains the model and prepare the views you want to issue. A floor plan, elevation, section, detail, drafting view, 3D view or rendered view can go on a sheet. If the plan itself still needs a view range, crop, tags or dimensions, finish that work first in a floor plan ready for a sheet. You can apply a view template before placement when its graphic settings should be consistent, but remember the difference between applying and assigning one: applying changes the view now, while assigning keeps it linked to later template edits.
Use this small scope check before you create pages:
| Item | Placement reach | Use it for |
|---|---|---|
| Drawing view, including a model view | The same view can be on one sheet only | A plan, elevation, section, detail or 3D view that documents the model |
| Legend | Can be placed on multiple sheets | Shared symbols, notes or graphic keys |
| Schedule, including a view or sheet list | Can be placed on multiple sheets | Tabular information that belongs beside the drawings |
| Title-block data | Project-wide or sheet-specific | Client and issue data, then the number, name, designer or reviewer for one page |
The one-sheet rule is the first check when a view seems to be missing later. Autodesk documents that a model view can be placed on only one sheet. To show the same view on another page, create a duplicate view and place that duplicate. Legends and schedules are the documented exceptions: place the same one on every sheet that needs it instead of making a copy.
Create the sheet and choose its title block
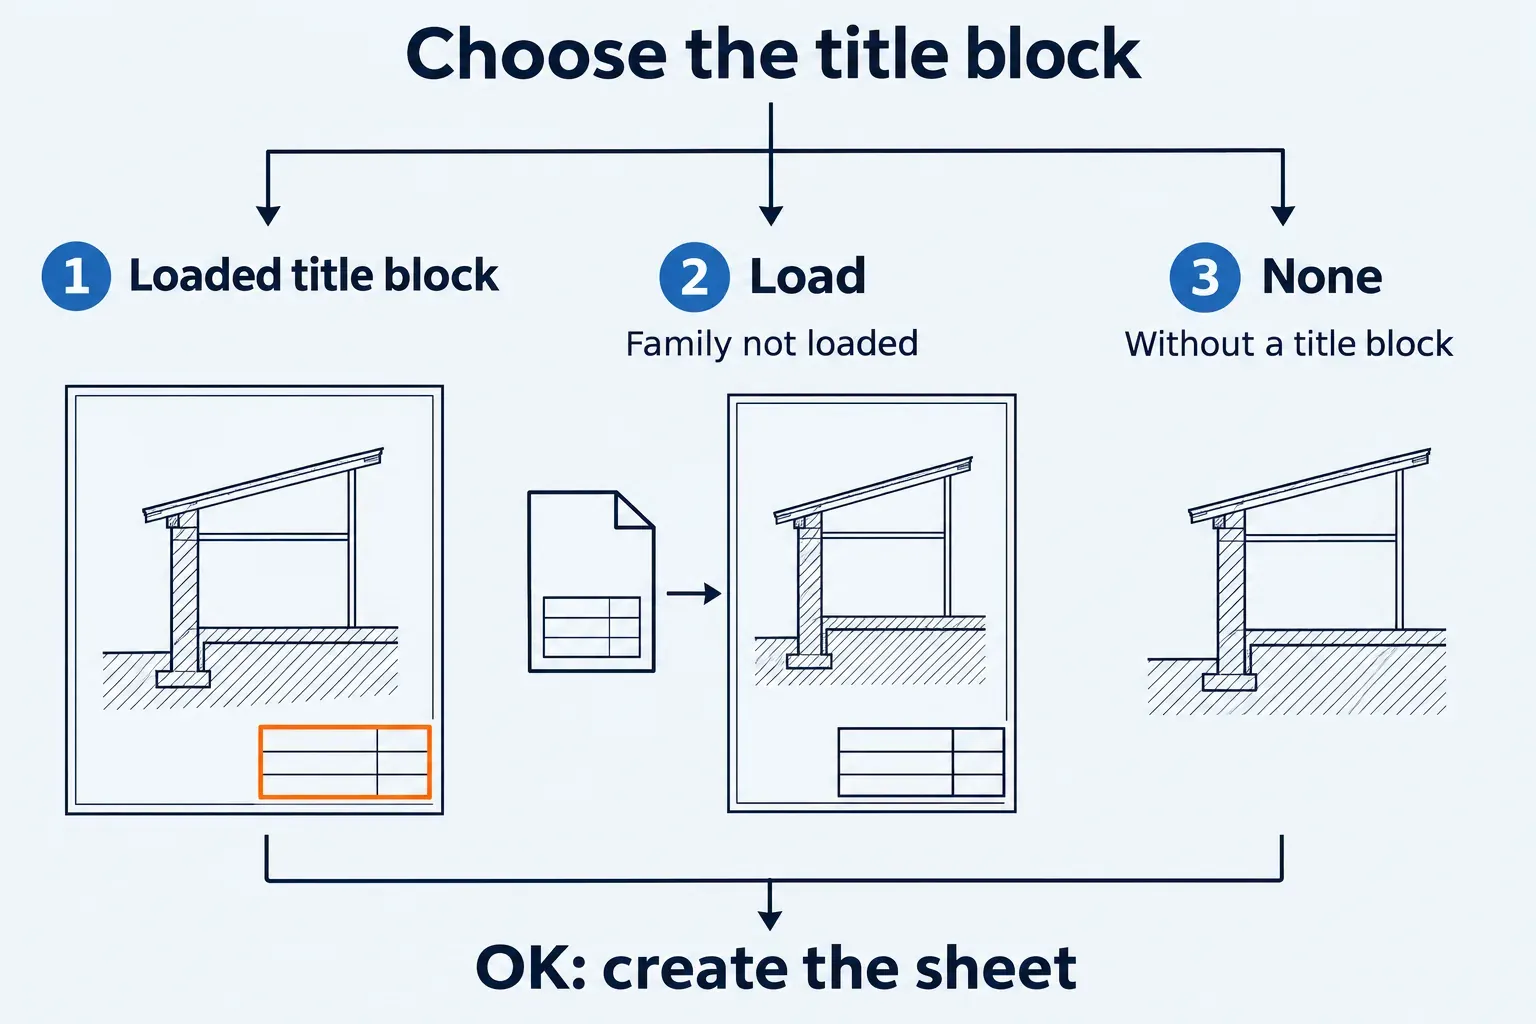
- Click View tab, Sheet Composition panel, Sheet. This opens the New Sheet dialog.
- Choose a title block from the list. The title-block family defines the page size and appearance, including its border, labels and any revision information.
- If the list does not contain the size or office family you need, click Load, open the library's Titleblocks folder or another known family location, select the file and click Open.
- If a border is not needed for this working page, choose None. You can still add views to the sheet, but there will be no title-block graphics or fields around them.
- Click OK. Revit creates the sheet and assigns a default number and name.
Confirm the result by expanding Sheets (all) in the Project Browser and opening the new page. If it is not listed, check that the New Sheet dialog completed and that the Project Browser is showing sheets for this project.
I'd give the sheet a working number and name before placing a large group of views, because those identifiers make the page easier to find in the Project Browser. Revit warns when a number is already used within the applicable scope: once among sheets directly in the model and once within each Sheet Collection.
Place views on the sheet
With the new sheet open, place the views that are ready for this page. There are two useful routes, and both end with a viewport that you position with the cursor.
Drag a view from the Project Browser
- Expand the Views branch in the Project Browser and locate the plan, elevation, section, detail or 3D view.
- Drag the view onto the open sheet. Revit shows the viewport outline as you move the cursor.
- Move the outline clear of the title block and any other viewport, then click to place it.
- Repeat for the other views that belong on this page. For a legend or schedule, find it in its corresponding Project Browser list and drag it onto the sheet.
Use this route when the browser already has the view in sight. If you cannot find a view, the Project Browser guide explains its branches and search. A drawing view that is already on a sheet cannot be placed on a second sheet. Right-click the view in the Project Browser and choose Open Sheet to find its existing page, or duplicate the view when the drawing really needs a second page.
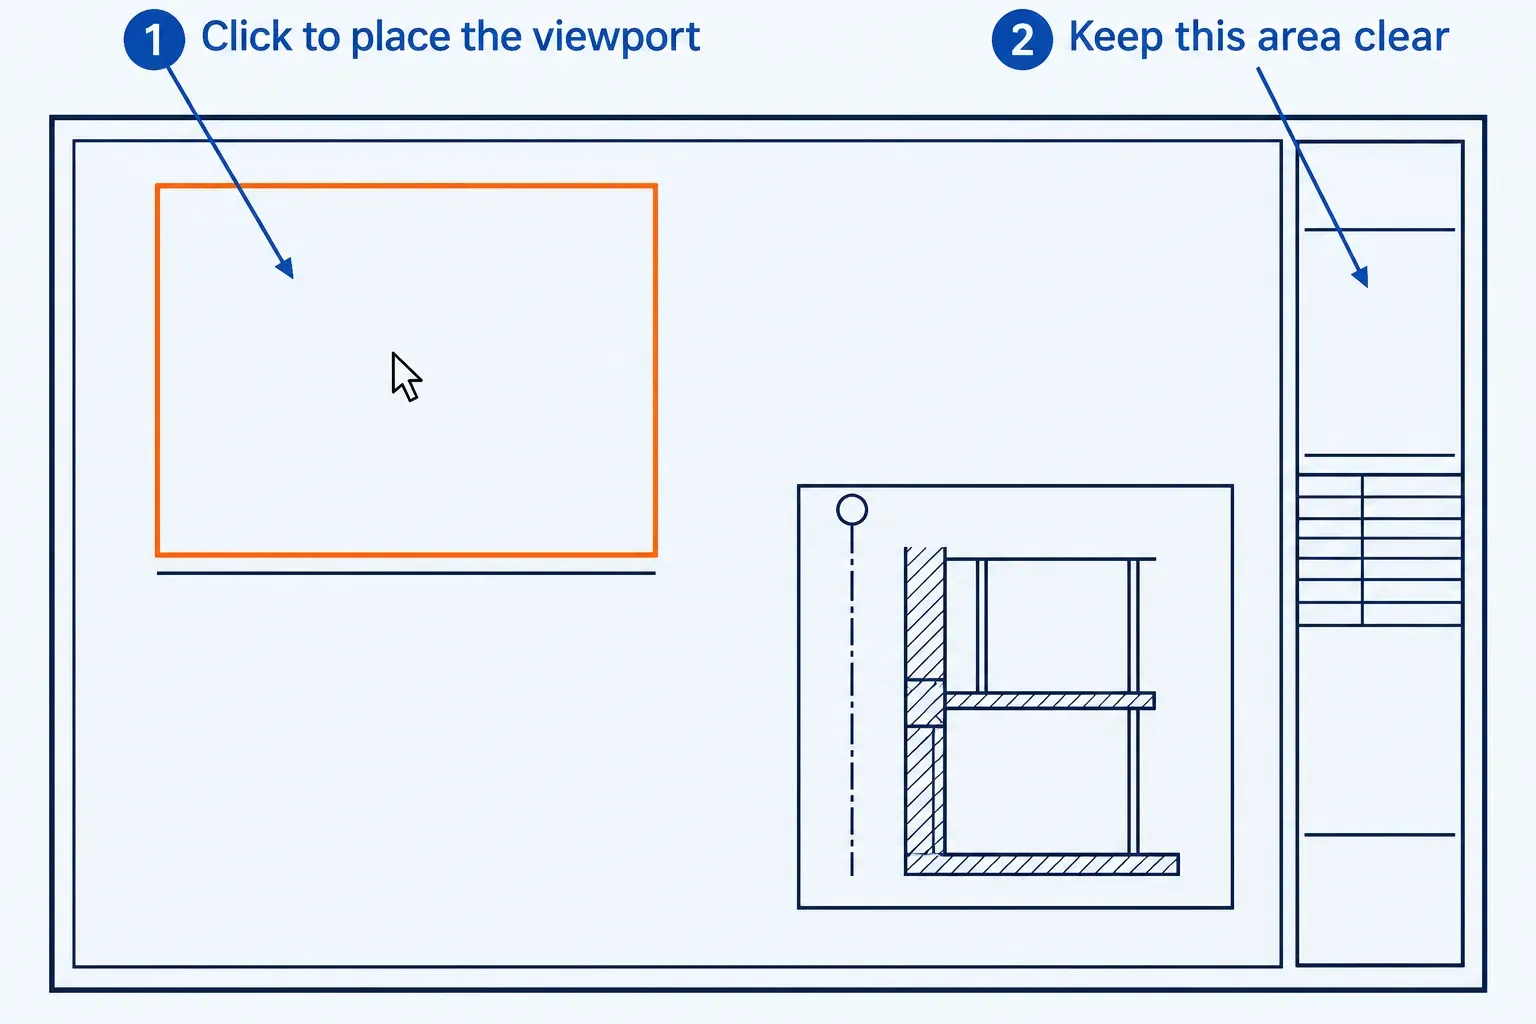
Use Place View when the browser is crowded
- Click View tab, Sheet Composition panel, Place View.
- In the Views dialog, select the required view from the list.
- Click Add View to Sheet.
- Move the viewport outline over the page and click its final location.
Use the same command again for each eligible view. If a plan is absent from the dialog, check whether it is already placed before creating a duplicate. That check avoids creating a second view when the task is simply to find the first one.
Schedules and legends behave differently from model views. You can add the same legend or schedule to several sheets, including a sheet list or view list. Keep a schedule far enough from the title block that its last column and the page border remain readable at the chosen scale.
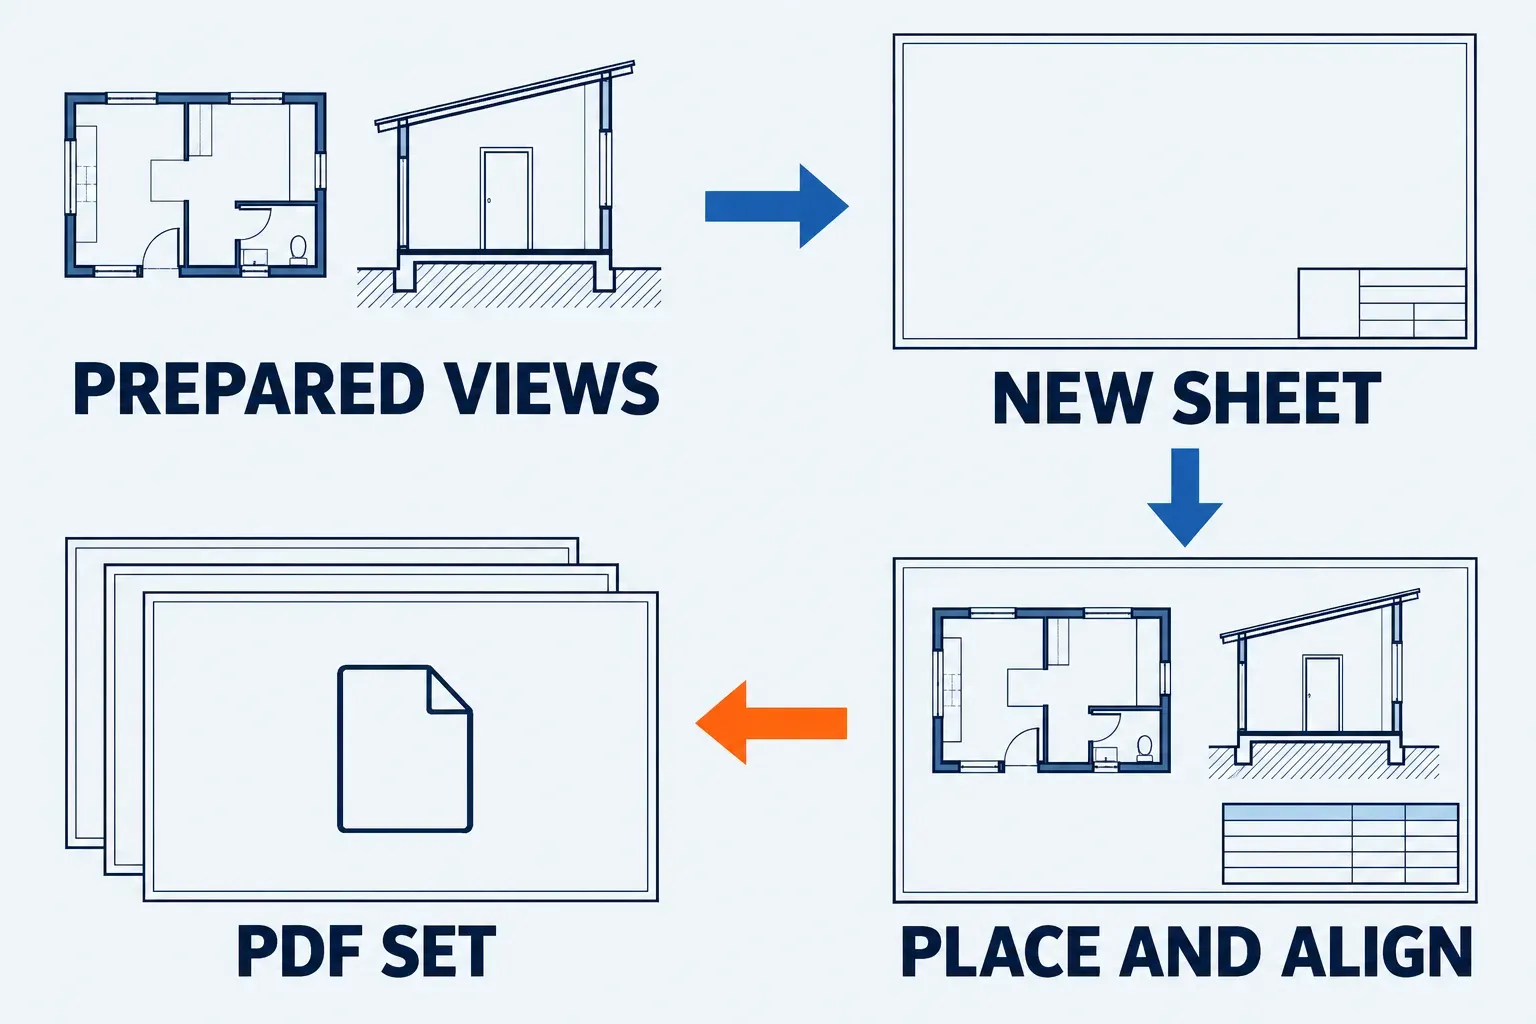
Align, edit and lock the viewports
A viewport is the placed representation of a view or schedule. Treat its position as part of the page layout, then activate the view only when you need to change what the reader sees inside it.
Align the page layout
For a few viewports, drag one to the desired location, then drag another until Revit shows a dashed line when their view titles align vertically or horizontally. This view-title alignment works for views, not schedules. For repeated positions across a set, use a guide grid:
- Click View tab, Sheet Composition panel, Guide Grid. In Assign Guide Grid, choose Create new, enter a name and click OK.
- Drag the grid's extent controls until it covers the part of the page you want to align.
- Select a viewport, click Move and snap its crop region or datums to the grid lines.
Datum intersections snap only when the datums are parallel to the grid, so arc grids and angled reference planes won't; the grid creates no constraint on other sheet elements, and Assign Guide Grid, Choose existing reuses it on other sheets so similar plans land in the same position.
Keep the title block clear and leave room for the view titles and schedule headings. The goal is a repeatable visual baseline, not a grid that hides the page margins.
Change the view without moving its viewport
Model views show a view title by default. You can edit the title text or use a viewport type that changes the line or omits the title. Schedules do not display viewport titles. Check the schedule's own heading after it is placed instead of looking for a model-view title underneath it.
To change the crop, pan the contents, add a note or dimension, or change the scale, select the viewport and click Activate View on the Modify | Viewports tab, Viewport panel. Only the active view displays normally while the title block becomes halftone. Make the edit, then double-click outside the viewport or use Deactivate View before continuing the page layout. That keeps the crop and the sheet position as separate decisions.
I'd pin a settled viewport before arranging the next one, because an accidental drag changes the page layout. Select the viewport or schedule and click Pin on the Modify | Viewports tab, Modify panel. Click the pin icon to unpin it when a deliberate move is needed.
Fill the title block and number the set
A title block can mix information that belongs to the entire project with information for one sheet. Keep those scopes separate so a reviewer does not see a page-specific note copied onto every sheet.
- Project-specific information: issue date and status, client, and the project's address, name and number. Open Manage tab, Settings panel, Project Information, or open a sheet, click the project text in its title block and edit it there. Revit updates the project fields on every sheet. The exact visible fields depend on the title-block family.
- Sheet-specific information: sheet name and number, designer, reviewer and any other parameters exposed by the family. Click that text in the sheet's title block and edit it, or change its properties in the Properties palette. Those values stay with that sheet.
To rename or renumber later, right-click the sheet under Sheets in the Project Browser and choose Rename, press F2, or change Sheet Number and Sheet Name in the Properties palette. Revit carries the change through references in the project. In Revit 2027, the same Sheet Number value can be used once among sheets directly in the model and once within each Sheet Collection. Sheet Collections arrived in Revit 2025, so in Revit 2024 and earlier, which have no Sheet Collections, each sheet number must be unique in the project. Resolve a duplicate-number warning within the scope that applies before continuing.
Export the sheet set to PDF or print it
Review sheet numbers, view titles, schedule headings and revision data before output. For a PDF handoff in Revit 2027, the built-in export keeps the task in Revit and lets you choose a single combined file. Use the Print dialog when the job needs a physical printer or a particular PDF print driver.
Use the built-in PDF export
- Click File tab, Export, PDF Export.
- Choose Selected views/sheets. Select the pages for this issue or choose a saved set.
- Choose or save an Export Setup. Check size, orientation, appearance, output processing, naming rules and options for this delivery.
- Under File Name, provide a name. Select Combine selected views and sheets into a single PDF file when the recipient needs one document; leave it unselected for separate files.
- Browse to the destination folder and click OK. Revit exports the selected views and sheets there.
Open the saved PDF and check every page against the intended set: page size, crop, scale, titles, schedule columns and revision information. A clean view in the model is only one part of a readable page.
For a required PDF print driver, follow the Print to PDF route: File tab, Print, choose the installed driver in Name, then select Selected Views/Sheets under Print Range. In Setup, paper sizes depend on the selected printer; Zoom can fit the drawing to the page or use a percentage of its original size. Check that choice whenever the issued drawing must retain its scale.
If a sheet or view does not appear
- The sheet is missing: expand Sheets (all) in the Project Browser. A row added to a sheet list with Insert Data Row is a placeholder sheet, not yet a sheet in the Project Browser. In New Sheet, choose the title block, select that row under Select placeholder sheets and click OK to turn the row into a sheet.
- An existing sheet has no title block: open the sheet and add one to the existing page: choose View tab, Sheet Composition panel, Title Block, select a family in the Type Selector, then click to place it. If the family is not loaded, load it first with Insert tab, Load from Library panel, Load Family.
- The view is missing from Place View: check whether the model view is already placed on another sheet. Open that sheet with Open Sheet in the view's Project Browser context menu, or duplicate the view before trying again. Legends and schedules may be reused, but a model view may not.
- The page looks crowded: activate the viewport and change the crop or scale, then deactivate it before moving the viewport. Keep view titles and schedule columns inside the usable page area.
Keep the exported PDF beside the model for the final page-by-page review, including the sheet references that changed during numbering. Two conditions change the route: in a workshared model, check that you can edit the sheets before renumbering them, and Revit 2021 or earlier has no PDF Export (it arrived in Revit 2022), so print through a PDF driver with the Print to PDF route above. If the sheet set has to move into another project, continue with copy sheets to another project and check what the source file can carry.